
Canon Content Transfer Professional Setup Guide
Set up Canon Content Transfer Professional (Canon CTP) to send photos from your camera to Impulse over SFTP, so guests get their photos during the event.
5 min read

This guide shows how to set up Canon Content Transfer Professional (Canon CTP) so the photos you shoot upload to Impulse in real time. This guide assumes you know how to plug in you camera to your phone, if that's not the case checkout this guide.
Overview
The Canon Content Transfer Professional app lets you hard-wire your camera to your phone which will then receive the pictures as soon as they are taken and transfer them to the Impulse cloud using our SFTP server.

Camera compatibility
Before we get started, you'll have to make sure your camera is compatible with the Canon app. Head to the Camera Compatibility page to check if your model is compatible, make sure it says "Compatible with Canon CTA".
If your camera is not compatible don't worry! You can always upload your picture from our web interface, setup a Google Drive, Dropbox folder or do regular SD card drops to the SFTP. Checkout this guide to know more.
Configuring your camera
Canon cameras generally work pretty well right away, but there are a few things you might need to adjust in the camera settings:
Make sure to shoot in JPEG, the app will not transfer RAW files.
If you are shooting only for Impulse we recommend setting your "Image quality" setting to no RAW, only Medium smooth JPEG
If you require RAW or big JPEGs for post-processing, the app will automatically ignore RAW files so you can shoot in RAW+JPEG. Be mindful of upload speed: shooting big JPEGs will take significantly more time to upload.
Make sure your camera has an SD card in all slots (or at least the slot that the app is looking at, check the server settings on the app). The app will not work if the camera doesn't have an SD card.
Configuring the app
Let's walks through how to setup the app from scratch. First we need to register the SFTP server in the app.
Download the app here: https://play.google.com/store/apps/details?id=jp.co.canon.ic.ctp
Open the app
Click on "Transfer settings"
Click "Upload destination"
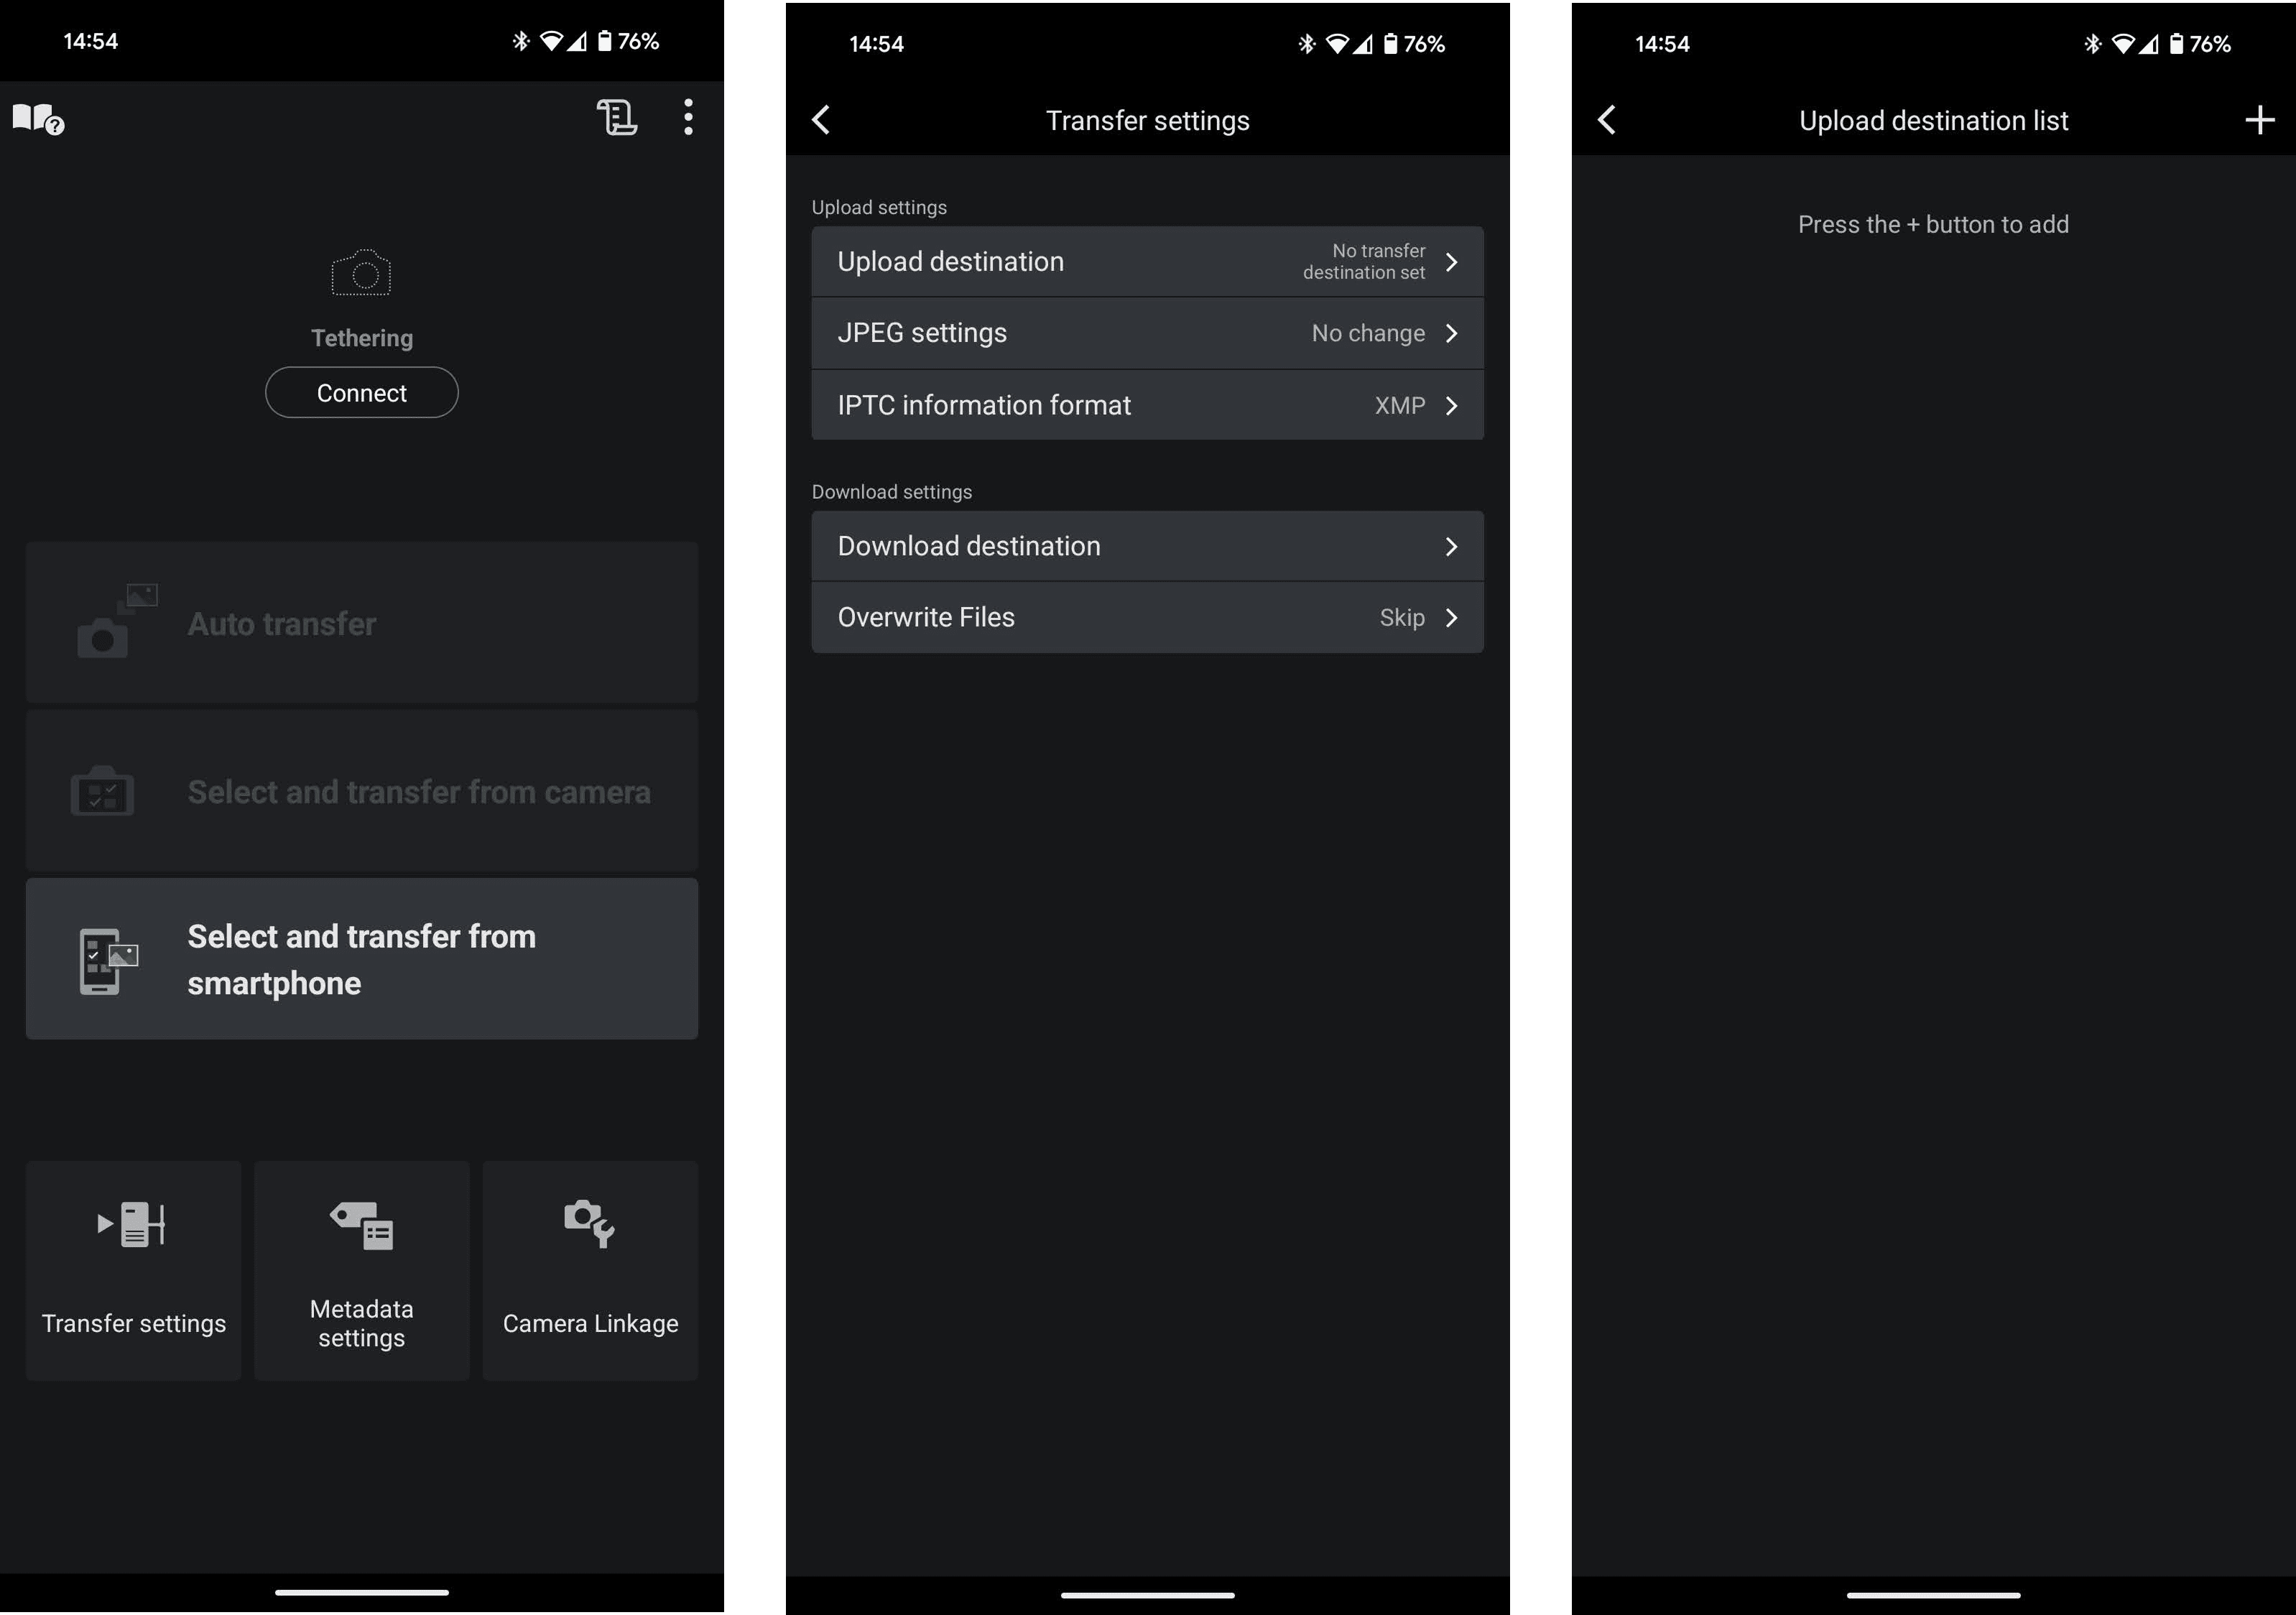
If you've used the app before this will show a list of the servers you've registered, you can always edit an existing one if you want. If the list is empty, click the "+" button at the top right
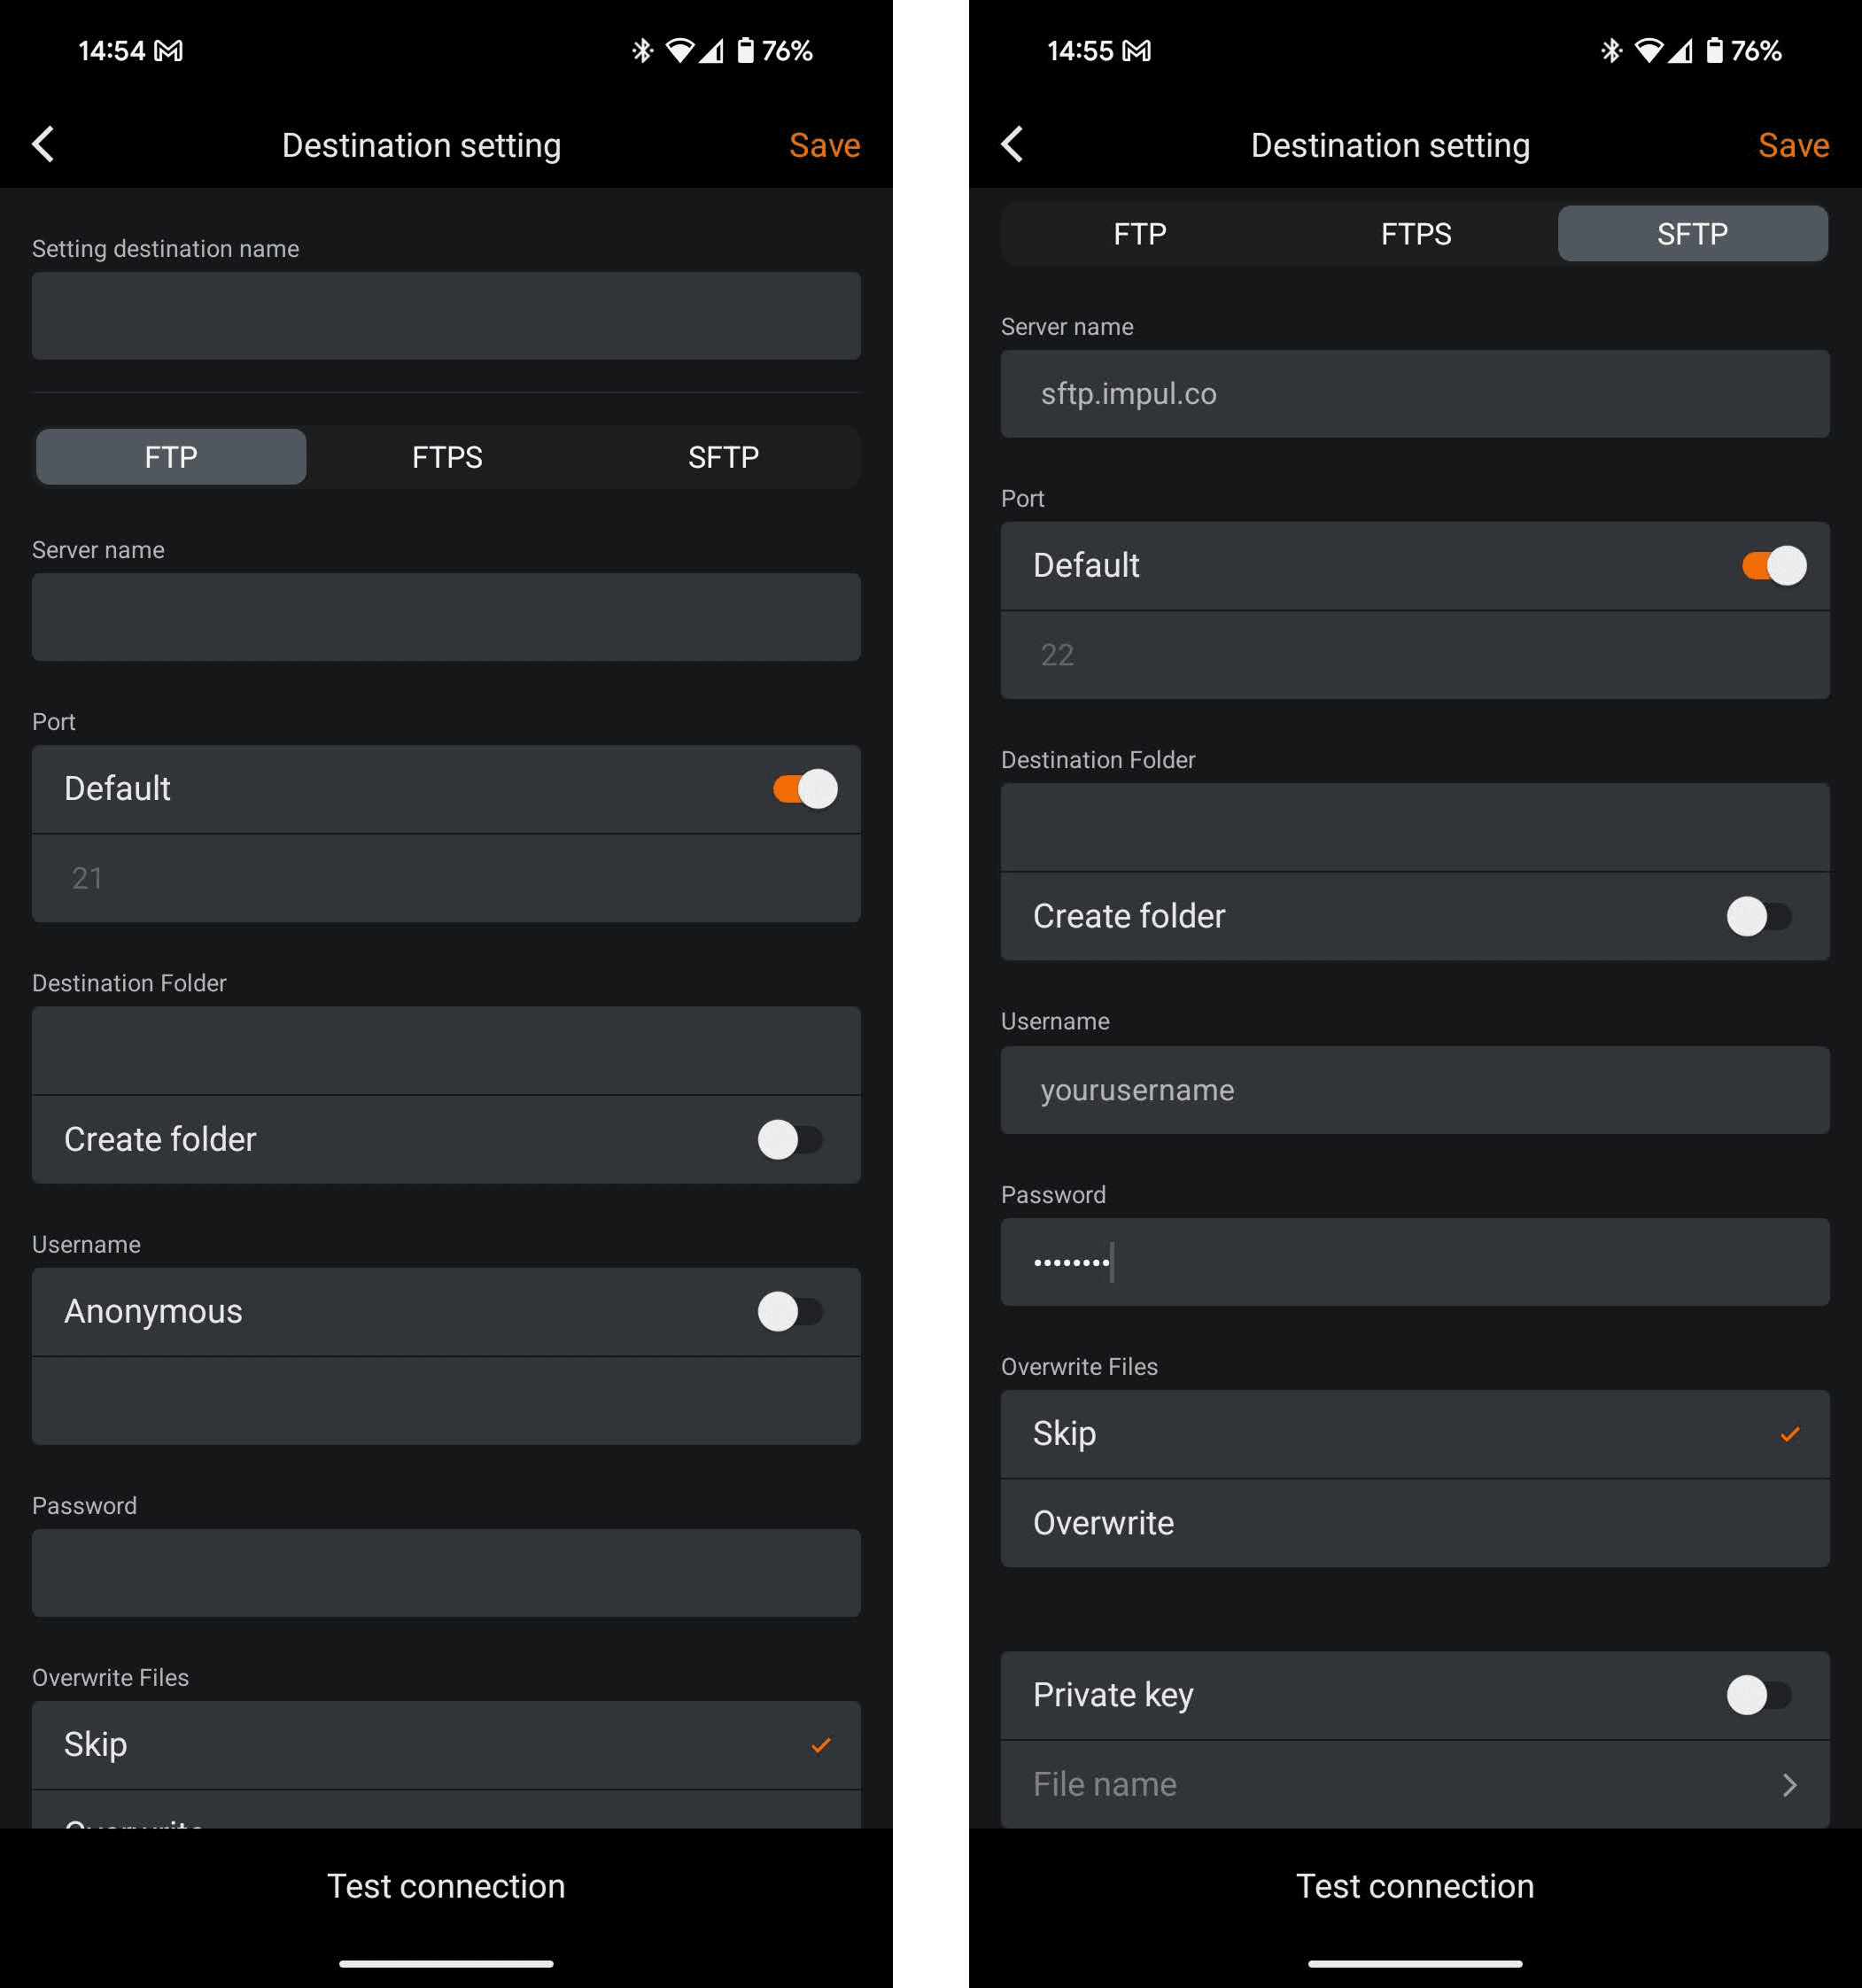
This is where we enter our server details:
"Setting destination name" is just for you, enter a name you will recognize later
Change the server type to "SFTP"
Server name: sftp.impul.co
Port can be left to default "22"
Ignore Destination Folder
Enter your username: Contact your Impulse representative
Enter your password: Contact your Impulse representative
Overwrite files can be set to either settings, the default Skip is fine
Leave Private key disabled
Once everything is filled, click "Test connection" at the bottom, it should show a success message.
Once the connection is tested, click "Save" at the top right
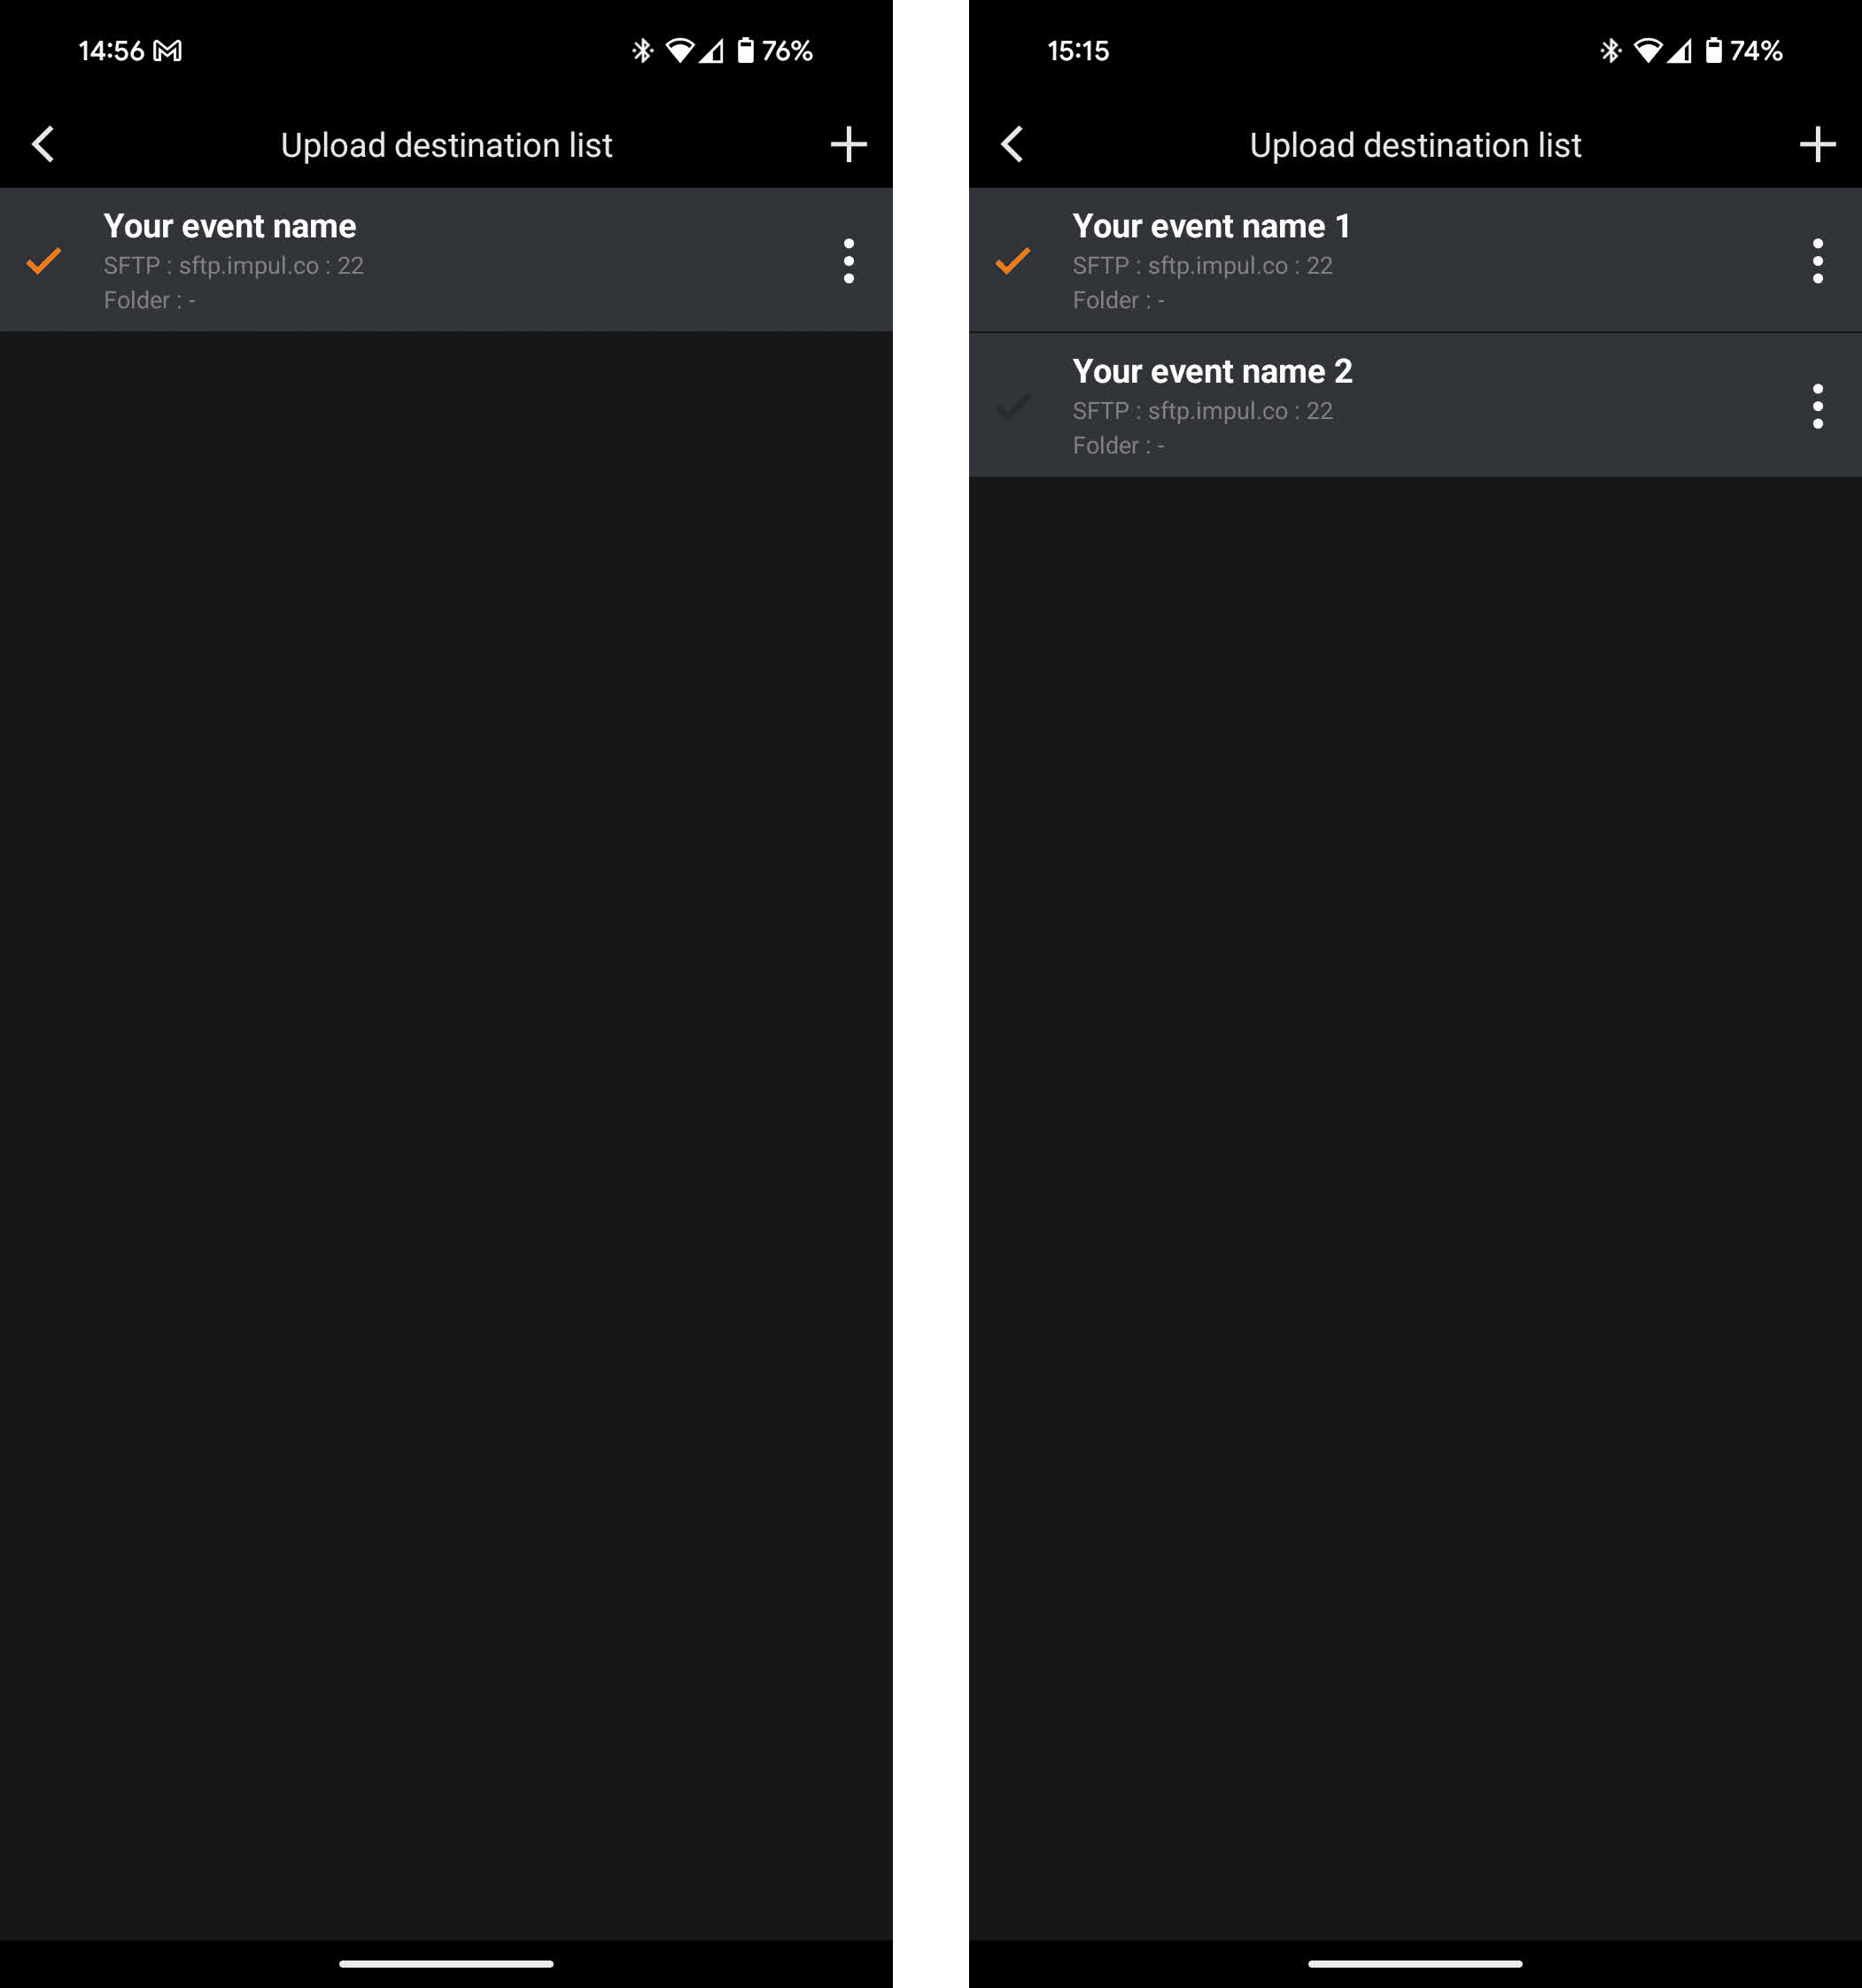
If you have several servers configured, make sure the correct one has the green check mark by clicking on it
Connecting the camera
Now that we have the server registered on the app, we can plug in the camera. Make sure your Canon camera is turned on and the app is open, then plug the cable between the phone and the camera.
If this is your first time connecting, the system will show you a permission request. Check the box with "Always open" and click "OK".
The first time you connect might take a few tries. If the camera stays more than 20 seconds on the connection screen before showing up on the app, here is a few things you can try:
Unplug/replug the cable while the camera is on
Turn off/on the camera while the cable is connected
A number of Canon cameras disable their USB port (sometimes labelled as the DIGITAL port) when WiFi is enabled, even if you aren’t currently using WiFi. If your Canon camera isn’t being detected, navigate to your camera’s setup menu and set the Wi-Fi or Wi-Fi/NFC setting to Disable, then try again.
Newer Canon cameras (starting from the EOS R6 Mark II) have a new setting: Choose USB connection app. This needs to be set to Photo Import/Remote Control in order for the app to connect. You can find out more information on this in your camera’s user manual. If your camera doesn’t have this setting, you’re good to go.
You should now see your camera model show at the top and the "Auto-Transfer" button light up
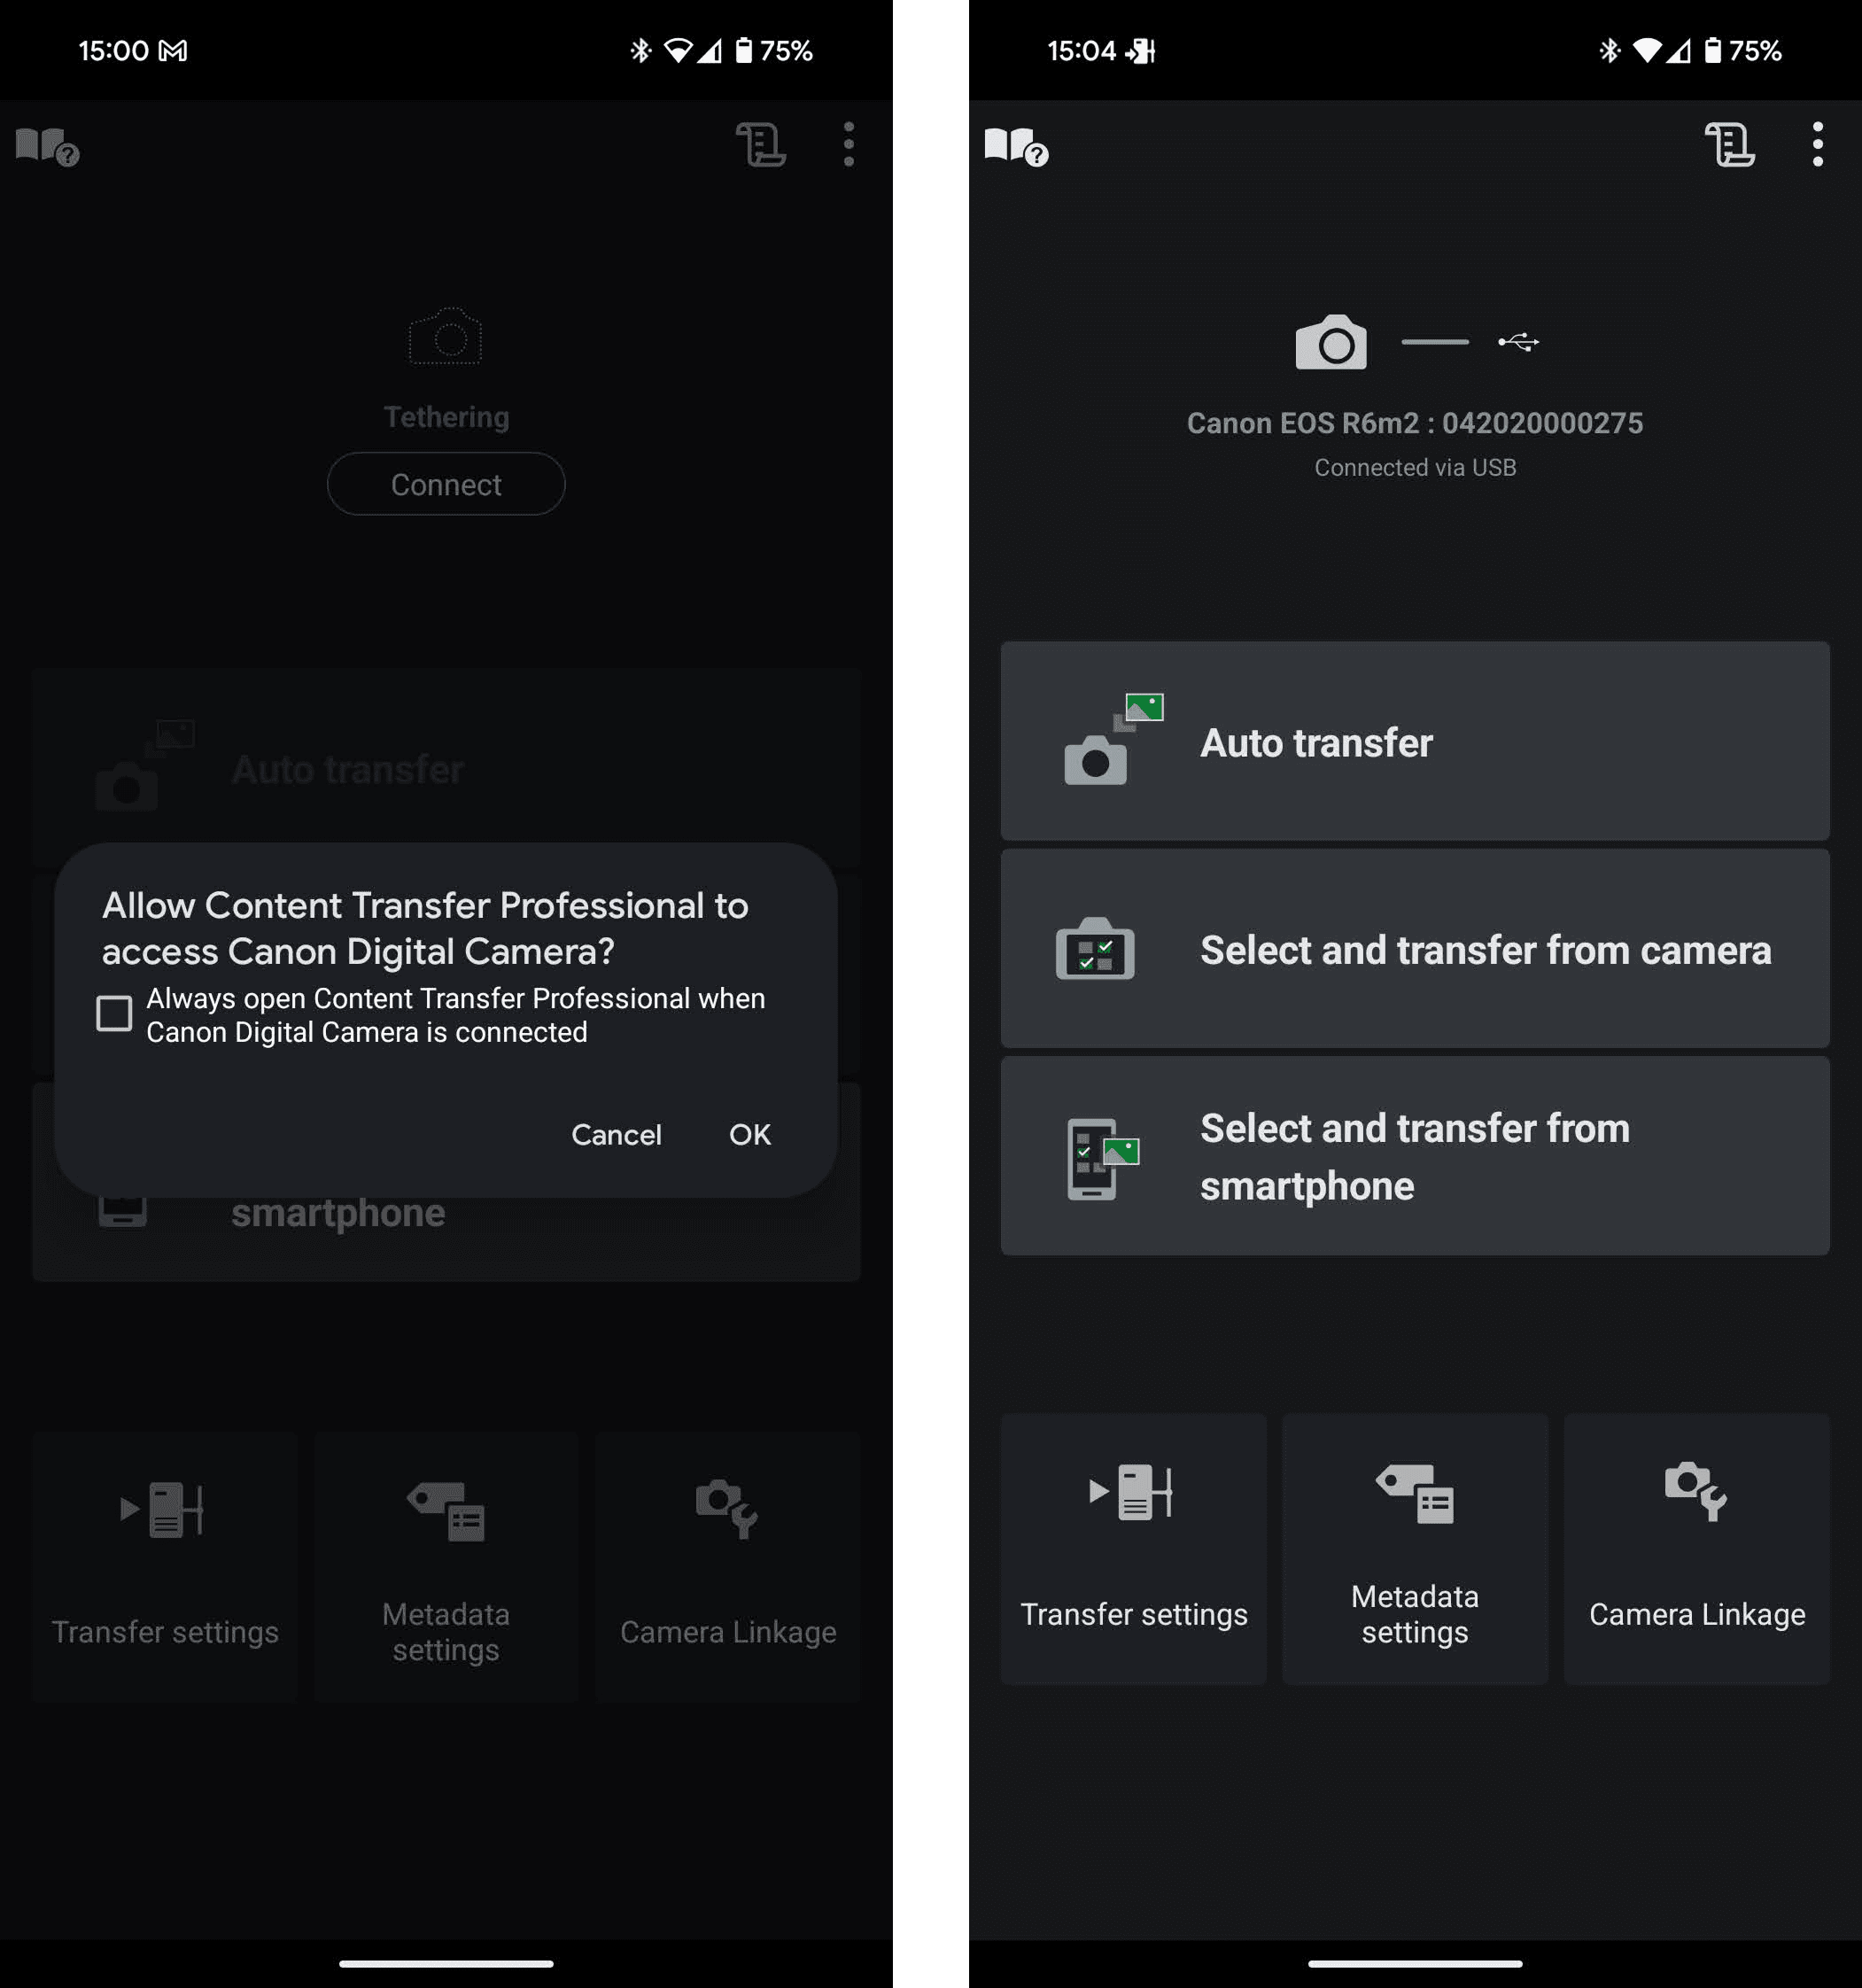
When you're ready to take pictures, or anytime your camera was unplugged or turned off:
Click "Auto-Transfer"
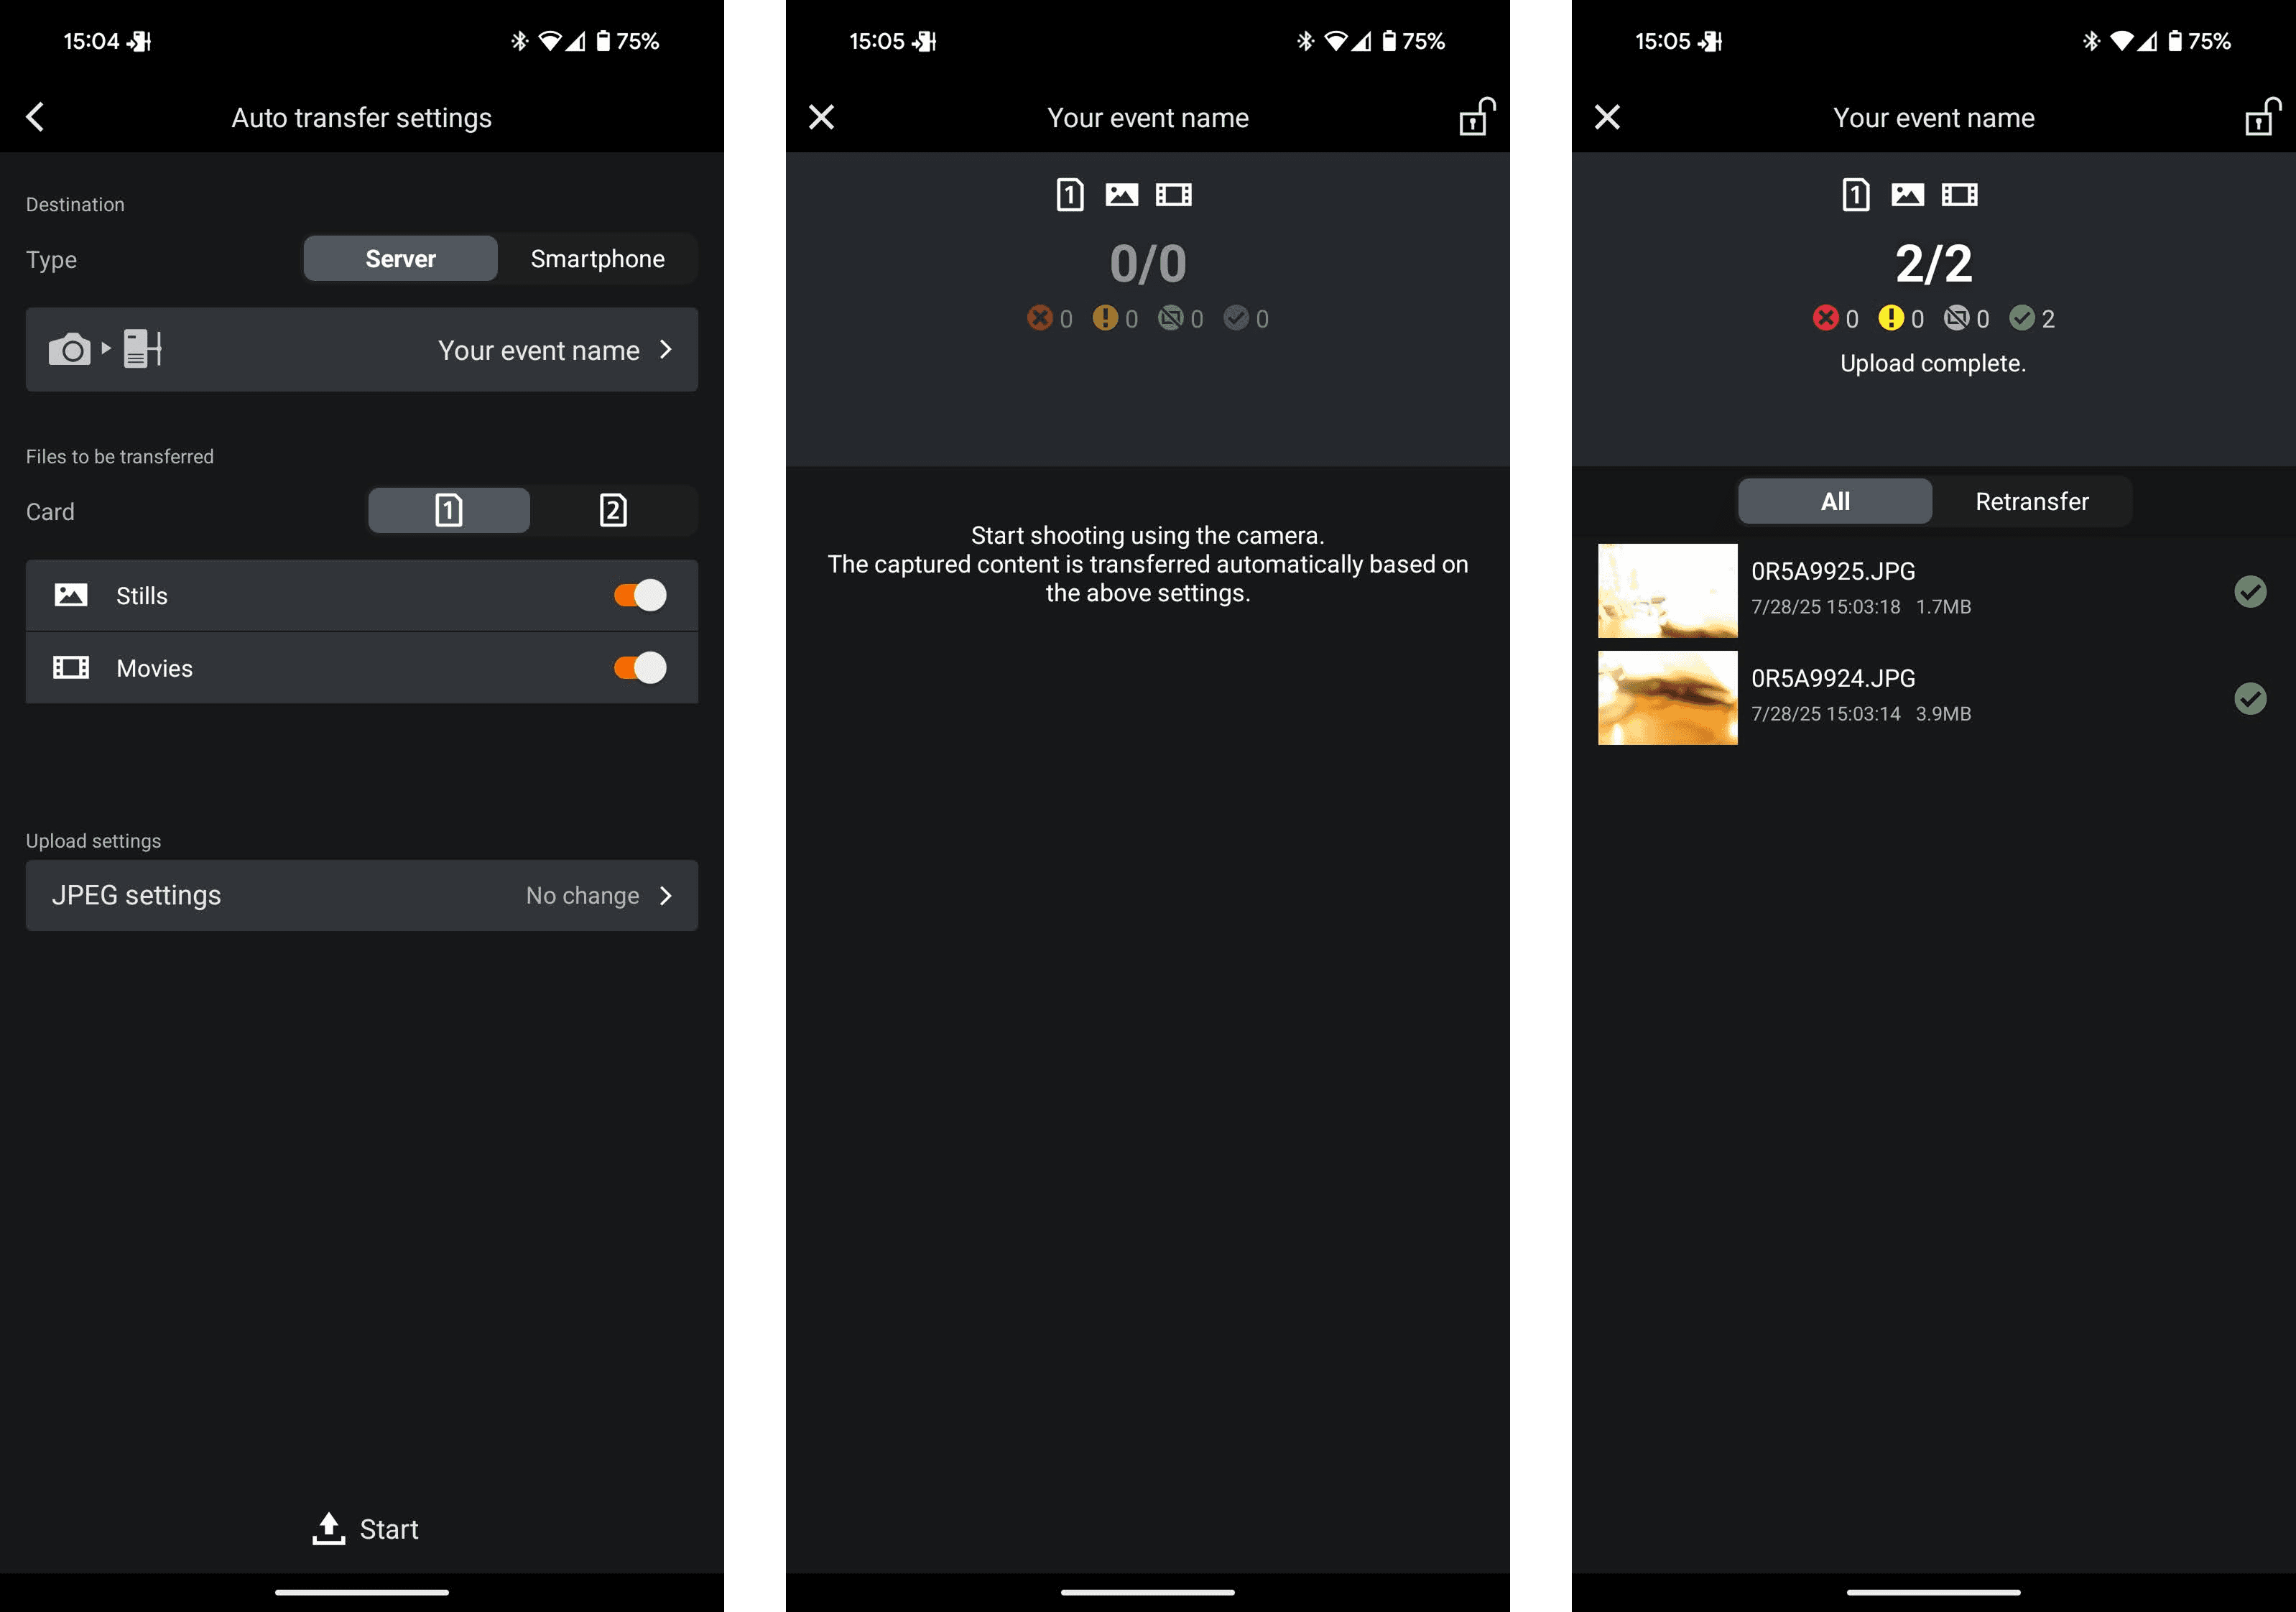
If you've properly put the green check mark on your SFTP server in the previous step you have nothing to do on this screen, just press "Start" at the bottom.
Otherwise select the correct server in the list by clicking the second option from the top shown as "Your event name" on the screenshot.That's it! If you get to this screen you're all setup to shoot and pictures will appear on the app and get transferred automatically.
Handling transfer errors and missing pictures
It's possible to get transfer errors if the connectivity on site is not perfect, or even to have the camera disconnect from the phone while shooting. In that case the Canon app doesn't let you re-transfer only the missing pictures, so you have a few options:
Use the manual section mode from the main screen of the app while having your camera connected
Do an SD card drop when you get the time, check this guide
In any case, do not worry about re-uploading pictures to Impulse: We automatically detect if the file has the same name as before, and even if it doesn't have the same name we have built in AI picture deduplication.
Take the Next Step with Impulse
Start your journey toward more engagement, greater social reach, and data driven decisions. Use Impulse and unlock your events' full potential.